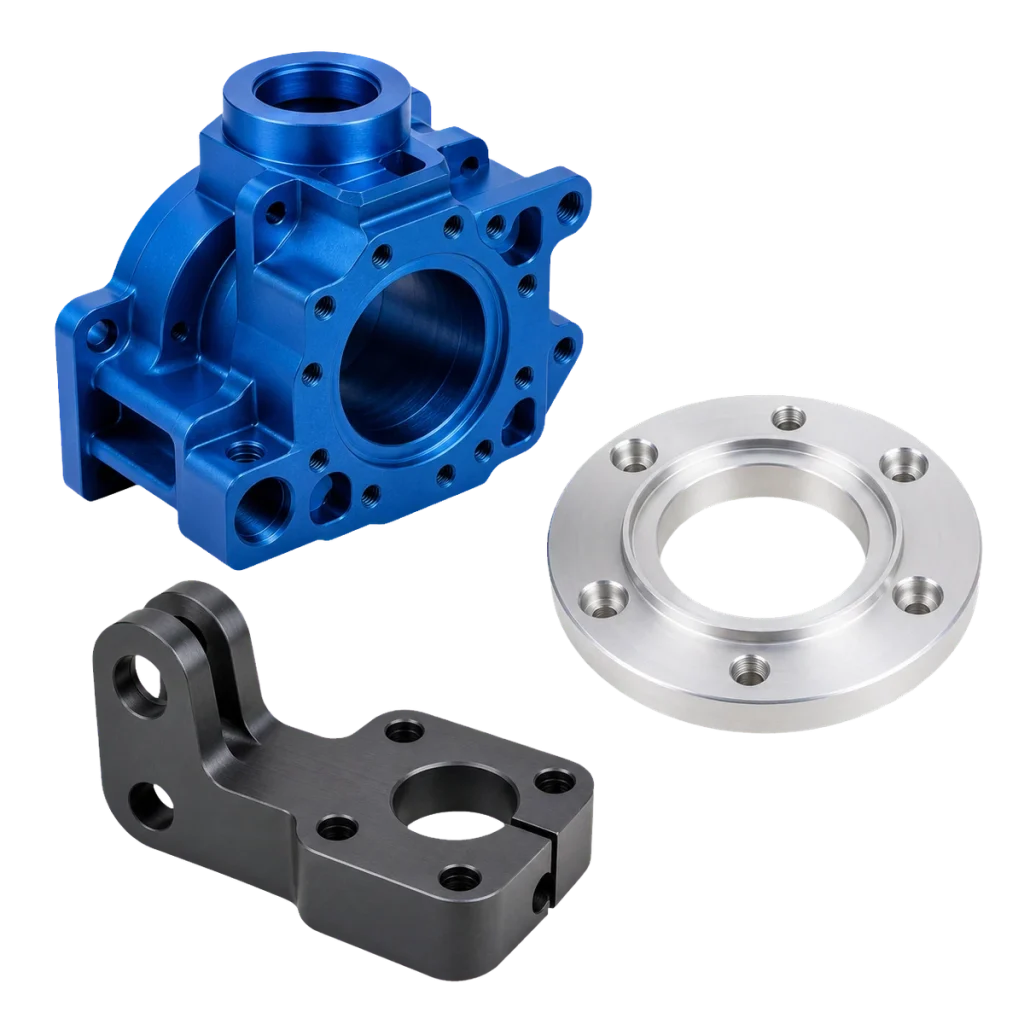
Type II vs Type III anodizing on CNC aluminum is a thickness and duty-cycle choice, not a color preference. MIL-A-8625 Type II sulfuric anodizing is 0.00007 to 0.0010 in (1.8 to 25.4 µm). Type III hardcoat is 0.0005 to 0.0045 in (12.7 to 114 µm), and 0.002 in (50.8 µm) is the nominal if you leave thickness blank. On 6061-T6 housings, use Type II Class 2 when you need sealed corrosion protection and a visible dye. Use Type III when wear faces, slides, or abrasive handling matter more than bright color. Write Class 1 or Class 2, a thickness range, whether dimensions apply before or after coating, and any mask for threads, press fits, or grounding. The oxide is electrically insulating, so a bare contact pad is a drawing note, not a shop default.
If you are a US or EU engineer sending an RFQ to a Dongguan CNC factory, “anodize black” is not a finish spec. The shop still has to pick Type, Class, thickness, seal, rack points, and masks. Those choices move fits by tens of micrometers and can insulate a chassis earth you thought was metal.
This page is the decision you should lock on the PDF before mill and bath are quoted as one job. Quantity does not pick the Type. A 20-piece prototype and a 500-piece batch should carry the same finish note if the duty is the same.
Key takeaways
- Default to Type II (about 8-20 µm, sealed) for colored 6061 housings with close fits and walls near 1.0 mm.
- Default to Type III (often 25-50 µm, or the 0.002 in nominal) when wear is the job and you have dimensional allowance.
- Call MIL-A-8625 Type, Class, thickness, before/after dimensions, mask zones, and pad size on the PDF.
- Do not use Type III as a substitute for a harder alloy. 7075 still machines and anodizes differently from 6061.
Type II vs Type III anodizing on CNC aluminum at a glance
Type II vs Type III anodizing on CNC aluminum should be selected from coating thickness, wear, color, and fit risk, not from a swatch book. The table below is the conclusion, not a menu of equal options.
| Factor | Type II | Type III | Best for | Watch-out |
|---|---|---|---|---|
| Thickness (MIL-A-8625) | 1.8-25.4 µm | 12.7-114 µm; 50.8 µm if blank | Match the duty | “Anodize” alone is not quotable |
| Wear | Modest | High | Slides, clamp faces | Thick films eat fits |
| Color | Clear, black, dyes when sealed | Gray, olive, muted black | Visible 6061 skins | 7075 dyes less evenly |
| Growth | Small | Large (~half the film outward) | Tight fits: Type II or mask | State before vs after |
| Electrical | Insulating | More insulating | Grounding needs a mask | Oxide is not a contact |
| Thin walls | 8-20 µm is usual on 1.0 mm 6061 | 25-50 µm can oil-can thin lids | Type II on membranes | Type III on 0.6 mm webs |
Bottom line: pick Type II for sealed color and corrosion on typical 6061 parts; pick Type III when abrasion is real and the drawing already budgets the film.
If the finish is still open, review aluminum anodizing finishing services against the alloy on YXT aluminum CNC machining before you freeze the PDF.
MIL-A-8625 Type II and Type III thickness ranges
MIL-A-8625F (issued 2003, validation notice 2019) is the callout most US drawings still use for Type II and Type III. Copy the Type, then add Class 1 (non-dyed) or Class 2 (dyed), then a thickness. Do not stop at the Type letter. A China shop quoting from a shaded STEP will still invent those fields if the PDF is silent.
For Type II, stay inside 1.8-25.4 µm (0.00007-0.0010 in). A practical 6061 housing window is 8-20 µm. That band is thick enough to take a sealed dye and thin enough that H7 bores and M3 threads can often be managed with a mask or a small allowance.
For Type III, the spec window is 12.7-114 µm (0.0005-0.0045 in). If you omit thickness, shops treat 0.002 in (50.8 µm) as the nominal. Write the range you will inspect. A wear face that only needs 25-40 µm should say 25-40 µm, not “Type III” with a blank. On 7075-T6, confirm thickness and appearance on a coupon of the same stock. Do not freeze a 50.8 µm Type III Class 2 black from a 6061 panel.
Class is not optional decoration. Class 1 is undyed. Class 2 is dyed. Type II Class 2 is the usual path for a sealed black 6061 enclosure. Type III Class 2 can be specified, but the color is often gray-green, olive, or a muted black. If the marketing photo is a deep Type II black, do not write Type III Class 2 and hope the bath matches.
Seal belongs in the same sentence as Type. Type II used for corrosion and dye is usually sealed. Type III used for wear is often left unsealed or only lightly sealed, because a heavy seal can reduce abrasion resistance. If you need both maximum wear and a dyed appearance, say so, approve a sample, and accept that you may give up some hardness.
In 2024 alloy tables from the Aluminum Association, typical 6061-T6 tensile values are about 45 ksi (310 MPa). Typical 7075-T6 tensile is often cited near 83 ksi (572 MPa). Those numbers do not pick the anodize Type. They do explain why 6061 remains the default when you want predictable dye, and why 7075 is chosen for load even when the film looks duller.
Dimensional growth, threads, walls, and fits
Anodic film grows both into the aluminum and outward. Plan about half the coating thickness outward, so a 50 µm Type III coat can add about 25 µm per surface to a diameter (about 50 µm on a shaft if both sides grow). That kills a press fit if the PDF is silent. A Type II film at 12 µm adds about 6 µm per surface. That is still enough to jam an H7 bore that was cut to the finished size.
State which dimensions apply after coating. ASME Y14.5-2018 (reaffirmed 2024) is how you flag a diameter, a position, or a profile as post-finish. General title-block bands do not tell the programmer to machine undersize. Feature notes do.
Threads need a rule, not a hope. Mask M3-M5 for Type III, or tap after anodize, or call an allowance. For Type II, still mask M3 and any thread that must gauge after finish. A 50 µm hardcoat in an M3 minor diameter is not a “slightly tight” screw. It is a scraped thread or a scrapped boss.
Press-fit bores, bearing seats, and dowel holes should be masked or dimensioned after coating. If you mask, hatch the bore on a 2D view. If you coat, give the after-anodize size and the allowed film. Do not mix “dimensions after anodize” in the title block with a cloud of pre-coat sizes on the same fits.
Wall thickness changes how aggressive Type III should be. On 6061 housings, 1.5-2.0 mm walls of moderate height take Type II or Type III without much drama. A 1.0 mm wall is a common production target and usually survives Type II at 8-20 µm. Below about 0.8 mm, treat Type III as a special process: the bath, rinses, and rack clips can oil-can a membrane that looked flat as-machined. A 0.5-0.7 mm window should stay Type II unless you have a coupon and a fixture plan.
Tall thin webs make growth harder to predict on CMM. A 0.8 mm wall that is 12 mm tall can taper from cutter deflection, then pick up another 10-25 µm of outward film. If wall thickness is contractual, name measurement points and say whether the micrometer reading is after coating.
Color, sealing, and wear after Type II vs Type III anodizing on CNC aluminum
Color, sealing, and wear after Type II vs Type III anodizing on CNC aluminum are coupled. You cannot pick a bright decorative black and a 50 µm unsealed hardcoat as if they were independent checkboxes. Type II is usually sealed for dye hold and corrosion. Type III used for wear is often left unsealed or only lightly sealed. If you need maximum wear and a deep black, say so and approve a sample on the same alloy, temper, and blast.
Bead blast before Type II hides tool marks and gives an even matte. Polished Type II shows every swirl. As-machined Ra 1.6-3.2 µm is a common start for functional faces. Ra 3.2 µm is a normal mill default. Ra 1.6 µm is reasonable on sealing faces if you pay for the extra pass. Type III will not hide a gouge. It will freeze the texture you send to the tank.
7075 and 2024 do not dye like 6061. Copper-bearing alloys often look mottled or gray-green after the same Class 2 process that makes 6061 a uniform black. If the A-side is a consumer-facing 7075 plate, either accept Class 1 (clear/gray hardcoat look) or run a coupon before you print a catalog photo. Do not mix 6061 lids and 7075 frames in one color lot and expect one Lab value.
Wear is why Type III exists. Clamp faces, sliding covers, and grit in the field are Type III jobs. A desktop housing that only sees a screwdriver at assembly is usually Type II.
If both wear and color matter, split the part. Coat the wear face Type III Class 1 and keep the visible skin Type II Class 2. That is two finish notes and often two racking setups. It is still cheaper than arguing a lot that is hard enough and the wrong black.
Mask pads, rack marks, and grounding on either Type
Anodic oxide is an insulator on Type II and Type III. Type III is simply a thicker insulator. If a USB shell, EMI gasket land, earth stud, or connector seat must conduct, hatch a mask. Do not rely on a rack scar as the contact. Rack marks vary from lot to lot.
Give a pad size a racking tech can tape or fixture. Many shops hold a 6-8 mm pad with tape. A 6-10 mm land on a boss is the easy drawing default. Smaller pads are possible with plugs, caps, or custom masks. Sub-3 mm islands on an A-side are a scrap risk: tape lifts, dye creeps, and the halo eats the pad. Put pads on bosses, not in the middle of a 0.6 mm membrane.
State the allowed leftover film at the mask edge. A 0.5-1 mm halo of mixed film is common unless you fixture-mask. If EMI needs a clean land, write the halo and the continuity check.
Rack marks are where current enters the part. They often look like small dull spots. Put them on a hidden face, a pocket floor, or a boss that is not the A-side. Do not put the only grounding pad and the rack on the same 4 mm island. If the whole exterior is cosmetic, add an internal rack boss and do not delete it in a CAD cleanup.
If masked aluminum also needs corrosion resistance, add a conversion-coating note on those areas only. That is a different process from Type II / Type III. Keep the notes separate so plating language and anodize language are not mixed in one line.
| Feature | Mask or coat? | Typical pad / plug | Best for | Watch-out |
|---|---|---|---|---|
| M3-M5 thread | Mask or tap after | Plug or tape | Gauge after finish | Type III in the minor diameter |
| H7 / press bore | Mask or after-size | Plug | Bearing seats | Silent 50.8 µm Type III |
| Chassis earth | Mask | 6-10 mm boss | EMI, glands | Pad on a 0.6 mm wall |
| Cosmetic A-side | Coat | Rack elsewhere | Visible 6061 | Rack clip on the A-side |
| Wear slide | Type III coat | None | Clamp faces | No allowance on a mating fit |
Bottom line: hatch every conductive or precision feature, size pads at 6-10 mm when you can, and keep rack marks off the earth path.
Decision tree and a worked RFQ example
Use this sequence. Do not stop at a vague split.
- If the part is a visible 6061 housing, needs black or color, and has fits closer than about 20 µm per surface, specify Type II Class 2, 8-20 µm, sealed, dimensions after anodize on the fits or mask those fits.
- If faces slide, clamp, or see grit, specify Type III Class 1, 25-50 µm (or 0.002 in ±20%), and mask or allowance every H7 bore, bearing seat, and thread.
- If walls are 1.0 mm or thicker and height is moderate, Type II or Type III can both be quoted. If walls drop below about 0.8 mm, prefer Type II unless a coupon proves Type III.
- If you need electrical grounding, mask pads of 6-10 mm on either Type. Do not rely on a rack scar as the contact.
- If the alloy is 2024 or 7075 and you want Type III plus a bright dye, run a coupon first. Do not freeze a Pantone from a 6061 sample.
Lock color and thickness on first article when Class 2 cosmetics are on the drawing. Write one finish sentence a CAM programmer can parse: alloy and temper, MIL-A-8625 Type II or Type III, Class 1 or 2, thickness, seal, prep, before or after dimensions, mask areas, rack-mark zone, and a color sample if Class 2. Attach STEP + PDF.
Worked RFQ example: a 6061-T6 handheld enclosure, 120 × 80 × 28 mm, 1.2 mm side walls, 1.5 mm lid, M3 corner bosses, one USB cutout, bead-blast black cosmetics, H7 for two 4 mm dowels, and a chassis earth on the USB seat.
Finish note that quotes: 6061-T6 plate, bead blast, MIL-A-8625 Type II Class 2 black, 8-20 µm, sealed. Dimensions after anodize except masked features. Mask: both H7 dowel bores, all M3 threads, USB connector seat 8 × 12 mm (NO ANODIZE, GROUNDING). Rack-OK: underside of a 10 mm internal boss, not the A-side. Continuity: pad to pad after finish. Quantity 40, first article with thickness coupon and color limit panel on the same 6061 lot.
That pack is millable and coatable. The wrong pack is a black-shaded STEP and an email that says “hard anodize if possible.” Undercuts may need 5-axis CNC machining. It does not pick Type II or Type III. Send the locked pack through YXT CNC contact.
FAQ
What is Type II vs Type III anodizing on CNC aluminum?
Type II is conventional sulfuric anodizing at 1.8-25.4 µm. Type III is hardcoat at 12.7-114 µm, often 50.8 µm if you omit thickness. Class 1 is undyed. Class 2 is dyed. Type II Class 2 sealed film is the usual colored 6061 housing. Type III is the wear coat when you have allowance or masks. Write Type, Class, and a thickness range you will inspect. Do not treat the Type letter as a color code.
Is Type III always thicker than Type II?
Usually yes, but the windows overlap near 12-25 µm. A 20 µm Type II film and a 25 µm Type III film can look similar on a CMM while behaving differently in wear and dye. If you need hardcoat wear, write Type III and a thickness such as 25-50 µm. If you need a thin sealed dye, write Type II and 8-20 µm. Overlap is why a blank thickness is dangerous: the shop may pick the Type III nominal 50.8 µm when you only needed a cosmetic coat.
Will Type III hold a bright black like Type II?
Often no. Bright decorative black is a Type II Class 2 job with a sealed film and a sample on the same alloy. Type III Class 2 is frequently gray, olive, or a muted black, and a heavy seal can work against abrasion resistance. If the catalog photo is Type II black, do not specify Type III to “make it tougher” and keep the same swatch. Split wear faces from cosmetic skins when both requirements are real.
Do I mask threads for both types?
Mask small threads for Type III. For Type II, mask M3 and any thread that must gauge after finish. A practical rule is: M3-M5 get plugs or tape unless you tap after coating. Larger threads can take an allowance if you write it. Type III at 50.8 µm in a small minor diameter is a common scrap mode. Hatch the threads on the PDF. An email after the bath is too late.
Can 7075 take Type III?
Yes, but thickness and color need a coupon of that alloy and temper. Do not approve 7075 cosmetics from a 6061 panel. 7075 is stronger and often duller or more mottled after Class 2. Thin 7075 plate also moves more when you pocket it, so Type III growth sits on a wall that may already be tapered. Confirm appearance, thickness, and a named wall map on first article.
What wall thickness is safe for Type III hardcoat?
Treat 1.5-2.0 mm 6061 walls of moderate height as routine for Type III at 25-50 µm. 1.0 mm is often holdable if height is limited and you inspect after coating. Below about 0.8 mm, prefer Type II unless you have support, a coupon, and a rack plan that does not clip the membrane. A 0.5-0.7 mm window is a local feature, not a whole-box Type III skin.
How large should a grounding pad be if I mask either Type?
6-10 mm on a boss is the drawing default most tape masks can hold. Many shops quote 6-8 mm without a custom fixture. Smaller lands need plugs or hard tooling. Sub-3 mm islands on a cosmetic face fail by dye bleed and tape lift. Put the pad on a boss, keep the rack mark on a different face, and add a continuity check after finish. Type III needs the same mask. It is not “more conductive” because it is thicker.
If you are still choosing Type II vs Type III anodizing on CNC aluminum, write Type, Class, thickness, wall-aware allowance, and mask zones (including 6-10 mm ground pads) on the PDF, then send STEP + PDF to YXT CNC for a mill-and-finish review. Use the Type II default for sealed color on 6061. Use Type III only when wear and allowance are both real.